

Key Takeaways
- Most draught-causing gaps around doors and windows can be sealed without professional help.
- Choosing the right sealant — caulk, foam, or weatherstrip — depends on gap size and location.
- A candle or incense stick is a low-cost tool for locating hidden draughts.
- Proper surface preparation is the single most important step for a long-lasting seal.
- Draught-proofing is among the most cost-effective home repairs homeowners can carry out themselves.
What you will need
Why Gaps Around Doors and Windows Matter
Even small gaps around door frames, window frames, and sills can allow a surprising volume of cold air into your home, forcing your heating system to work harder than necessary. Unlike major structural projects, sealing these gaps requires no specialist skills, minimal tools, and very little time. It's a foundational task covered in any thorough seasonal preparation guide — including our room-by-room winter readiness walkthrough.
The two main types of gaps you'll encounter are frame gaps (where a frame meets masonry or drywall) and opening-edge gaps (where a moving door or window sash meets its frame when closed). Each requires a different fix, so identifying which type you're dealing with saves time and materials.
Start With the Worst Offenders
Exterior doors — especially the front door and any door leading to an unheated garage or basement — typically account for the largest draught losses. Tackle these first before moving to windows. You'll notice the difference faster and stay motivated to complete the rest of the job.
What You'll Need
Gather the following before you start. Having everything on hand prevents stopping mid-task and disturbing partially applied sealant.
Caulk gun
Dispenses tube sealant in a controlled bead along frame joints.
Acrylic or silicone caulk
Fills static gaps between door and window frames and surrounding walls.
Self-adhesive foam or rubber weatherstrip tape
Seals the closing edges of doors and windows against their frames.
Utility knife
Removes old, failing sealant before new material is applied.
Plastic scraper
Lifts out loosened old caulk without gouging painted or wooden surfaces.
Candle or incense stick
Locates draughts by revealing air movement as a flickering flame or drifting smoke.
Expanding foam filler
Fills deep or large voids behind frames before a surface sealant is applied.
Painter's tape
Masks adjoining surfaces to keep sealant lines neat and protect paintwork.
What you will need
Step-by-Step: Sealing the Gaps
Work through each door and window systematically. Complete one opening fully before moving to the next so materials cure without being disturbed.
Locate the draughts
On a cold or windy day, hold a lit candle or incense stick a few inches from the edges of each door and window frame — including the corners and the bottom sill. Watch for the flame or smoke to flicker or bend toward the gap. Mark each draught location with a small piece of painter's tape so you don't lose track.
Also check where pipes or cables enter the wall near windows, as these openings are frequently overlooked sources of air infiltration.
Clean and prepare the surfaces
Remove any old, crumbling caulk or foam using a utility knife and a stiff plastic scraper. Avoid metal scrapers on painted wood frames, as they can gouge the surface. Once old material is removed, clean the area with a damp cloth and a mild detergent, then allow it to dry completely. Sealant applied over dust, grease, or moisture will not bond properly and will fail quickly.
Apply the appropriate sealant to frame joints
Load your caulk gun with the appropriate tube. Cut the nozzle at a 45-degree angle to produce a bead sized to match the gap — typically around ¼ inch. Hold the gun at a consistent angle and apply steady pressure as you draw it smoothly along the joint in one continuous motion where possible. Do not stop and restart mid-run, as this creates weak points.
Immediately after applying, wet your fingertip or a caulk-smoothing tool and run it along the bead to press it into the joint and create a neat, concave finish. Wipe away excess with a damp cloth before it skins over.
Fit weatherstrip or foam tape to opening edges
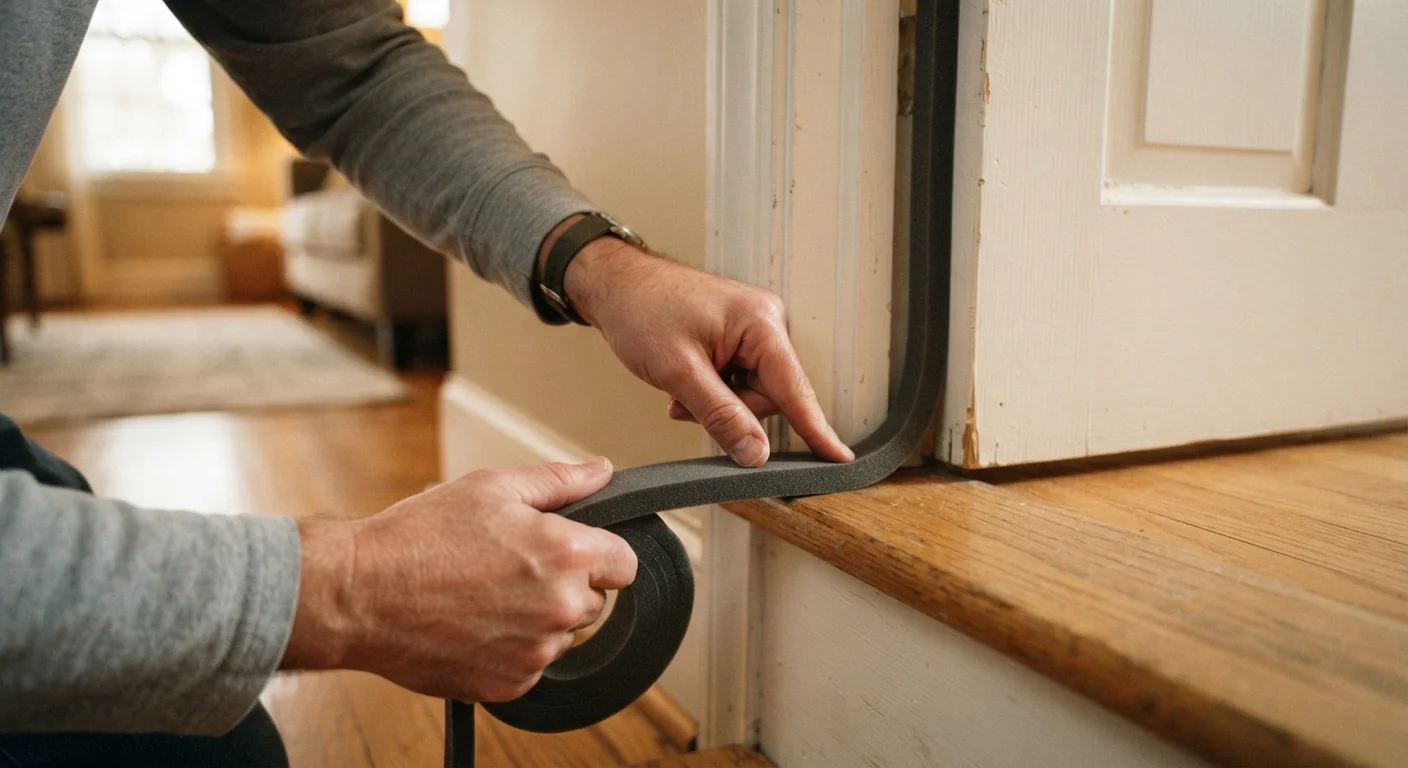
For the edges where a door or window sash meets the frame when closed, measure and cut self-adhesive foam or rubber weatherstrip tape to length. Peel back a few inches of the backing at a time and press it firmly into place along the frame rebate (the stepped recess the door or sash closes against). Work from one corner continuously to avoid gaps at joints.
Close the door or window to check the seal — it should meet resistance but still open and close without excessive force. If the door no longer latches properly, the tape may be too thick for that gap.
Allow adequate curing time before use
Check the product label for the recommended curing time. Most acrylic caulks are touch-dry within an hour but reach full strength after 24 hours. Silicone sealants typically require 24–48 hours to cure fully. Avoid opening or closing windows and doors across freshly applied sealant during this period, as movement will break the bond before it sets.
For gaps that go deeper than the frame — such as where a window frame meets an older plaster wall — expanding foam filler can bridge the void before you apply a surface sealant. If you're unsure whether a gap involves structural movement, consult a building professional rather than masking it with sealant alone.
Choosing the Right Material for Every Gap
Material choice is where many first-timers go wrong. Using the wrong product leads to cracking, peeling, or sealant that compresses and loses its seal within a season. Our detailed guide on caulk vs. grout covers the broader picture, but here's how to apply the logic to doors and windows specifically:
- Paintable acrylic caulk: Best for static frame-to-wall joints indoors. Accepts paint and remains flexible enough to handle minor seasonal movement.
- Silicone sealant: Preferred for exterior joints and anywhere moisture exposure is likely. Cannot be painted. For tips on application, see our article on common silicone sealant mistakes.
- Self-adhesive foam tape: Ideal for the closing edges of doors and casement windows. Compresses to fill gaps when the door or window shuts.
- Brush or fin-style draught excluders: Used along the bottom of exterior doors where a threshold gap lets cold air in under the door.
- Expanding foam: Suited to large, deep voids behind frames. Trim flush and cover with a surface sealant once cured.
If you're also dealing with a door that doesn't close cleanly — which can make any gap-sealing effort ineffective — check our door latching diagnosis guide first.
Troubleshooting and Keeping Seals in Good Shape
Even well-applied sealant can fail over time. Inspect every sealed joint once a year — ideally in early autumn before temperatures drop. Run your hand slowly along frame edges on a cold, breezy day to feel for air movement, or repeat the candle test described in Step 1.
Common causes of seal failure include:
- Surfaces that weren't fully clean or dry when the sealant was applied
- Excessive joint movement (doors settling, frames shifting) that exceeds the sealant's flexibility rating
- Foam tape compressed beyond its recovery point after years of use
- Silicone applied over a previously painted or oily surface without proper priming
If condensation is appearing on your window glass around the same time you notice draughts, the two issues may be connected. Our article on window condensation patterns can help you distinguish normal condensation from a sign of a more significant sealing problem.
Draught-proofing sits squarely in the category of low-cost repairs every homeowner can handle — and the results, in terms of comfort and reduced heating demand, are among the most noticeable of any DIY task.
When to Call a Professional
Gaps caused by structural settling, rot in the frame, or failed window glazing seals go beyond what surface sealant can fix. If you notice soft or discoloured wood around the frame, mould growth, or condensation forming between double-glazed panes, have a qualified contractor assess the situation. Applying sealant over hidden rot can trap moisture and worsen the underlying problem.