

Key Takeaways
- A running toilet is almost always caused by a faulty flapper, float, or fill valve — all DIY-replaceable.
- Turning off the water supply before opening the tank is the most critical first step.
- Replacement parts for most toilet tanks are inexpensive and widely available.
- A running toilet can waste hundreds of gallons of water per day if left unaddressed.
- Most repairs require only basic hand tools and take under an hour.
What you will need
Why a Running Toilet Isn't a Minor Annoyance
That constant hiss or trickle from a toilet that never fully stops running isn't just irritating — it's quietly expensive. A toilet with a leaking flapper can waste 200 gallons of water or more per day. Over a month, that adds up to a measurable increase on your water bill and unnecessary strain on household water use. If you'd like to understand how running water connects to your broader home plumbing, see our overview of your home's plumbing system.
The good news is that a running toilet almost always has a straightforward mechanical cause. Unlike problems that require cutting into walls or working with pressurized supply mains, toilet tank repairs involve low water pressure, simple hardware, and no specialized trade knowledge. With the right diagnosis and a small amount of time, most homeowners can resolve it completely. For context on how ignoring water issues tends to escalate costs, see our related article on what happens when small water problems go unaddressed.
What you will need
What You'll Need Before You Start
Gather these items before touching the toilet. Having everything on hand means you won't need to pause mid-repair with water turned off.
Adjustable pliers
Used to loosen or tighten the fill valve lock nut inside the tank.
Replacement flapper
Replaces the worn rubber seal at the bottom of the tank that controls water flow to the bowl.
Replacement fill valve
Replaces the mechanism that refills the tank after each flush if adjustment alone doesn't resolve the issue.
Small bucket or towels
Used to catch residual water when draining or disconnecting tank components.
Food coloring or dye tablet
Dropped into the tank to detect a leaking flapper by checking whether color appears in the bowl.
Replacement parts are stocked at most hardware stores. If you're unsure which flapper size to buy, take the old one with you or photograph the inside of your tank, including any model numbers stamped on the porcelain.
Step-by-Step Repair Instructions
Follow these steps in order. Each one builds on the last, and skipping the diagnosis step (Step 2) is the most common mistake DIYers make — replacing parts blindly wastes time and money. For a broader look at the missteps that turn simple repairs into bigger problems, see our guide on common DIY repair mistakes to avoid.
Shut off the water supply
Locate the shutoff valve on the wall behind or beside the toilet base. Turn it clockwise until it stops. Flush the toilet once to empty the tank, then lift the lid and set it safely aside on a flat surface.
Diagnose the cause of the running
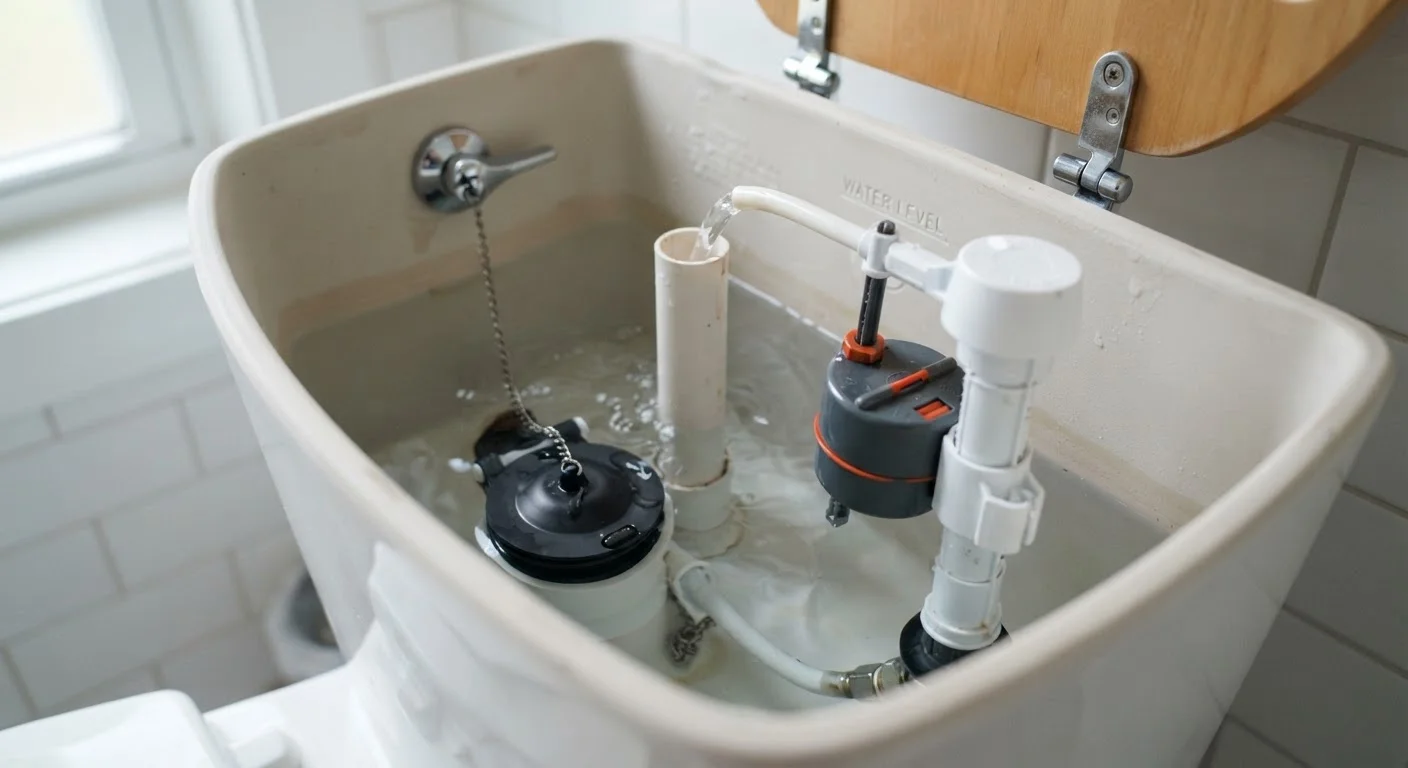
With the tank lid off, observe what's happening. There are three common culprits:
- Flapper not sealing: Water trickles continuously into the bowl. Add a few drops of food coloring to the tank water; if color appears in the bowl within 10–15 minutes without flushing, the flapper is leaking.
- Float set too high: Water spills into the overflow tube (the tall vertical pipe in the center of the tank). The water level should sit about one inch below the top of the overflow tube.
- Faulty fill valve: The fill valve hisses constantly or never fully shuts off, even when the float is at the correct height.
Adjust or replace the flapper
Unhook the old flapper from the pegs on either side of the flush valve seat and disconnect the chain from the flush handle arm. Bring the old flapper to a hardware store to match the size and style, or check your toilet's model number (usually stamped inside the tank) for a precise match. Snap the new flapper onto the pegs and reconnect the chain, leaving about half an inch of slack.
Adjust the float level
If water is running into the overflow tube, the float is set too high. Most modern toilets use a float cup (a cylinder that rides up and down the fill valve shaft) rather than a traditional ball float. To lower a float cup, pinch the clip on the side and slide it down the shaft. For a ball float arm, bend the arm gently downward or turn the adjustment screw at its base. The target water level is roughly one inch below the top of the overflow tube.
Replace the fill valve if needed
If adjusting the float didn't fix the running, the fill valve itself may need replacement. With the water off and tank emptied, use adjustable pliers to unscrew the lock nut under the tank (outside, at the base of the fill valve). Lift the old valve out. Drop the new fill valve in, hand-tighten the lock nut, and reconnect the supply line. Set the valve height so the critical level mark sits at least one inch above the overflow tube rim, following the manufacturer's instructions included with the valve.
Restore water and test
Turn the shutoff valve counterclockwise to restore water flow. Allow the tank to fill completely, then flush once and observe. The tank should fill to the correct level and stop. No water should trickle into the bowl, and the fill valve should go silent within about 60 seconds. If the issue persists, revisit your diagnosis — a second cause (such as both a leaking flapper and a misadjusted float) can sometimes be present at once.
Label Your Parts Before Removing Them
Take a photo of the inside of your tank before removing anything. A quick snapshot shows you exactly how the chain length looked, where the float sat, and how components were positioned. This reference makes reassembly and troubleshooting much faster, especially if you're working on the repair across two sessions.
When to Call a Licensed Plumber
This repair is designed to be DIY-friendly, but there are situations where professional help is the right call. If the shutoff valve behind the toilet won't close, or if it begins to leak when you attempt to turn it, stop and contact a licensed plumber. A failing shutoff valve is a separate issue that requires proper tools and can escalate quickly if handled incorrectly.
Similarly, if the toilet tank itself is cracked, or if you notice water damage on the floor around the toilet base, those issues go beyond tank hardware. A crack in porcelain can worsen under pressure, and floor damage may indicate a wax ring seal failure — a repair that involves removing the toilet from the floor. Learn more about how to handle those situations in our article on what homeowners get wrong when water problems start.
Avoid Over-Tightening Plastic Lock Nuts
Fill valves and supply line connections on toilets use plastic threading that can crack if over-tightened. Hand-tight plus a quarter turn with pliers is generally sufficient. If a connection leaks after this, check the washer seal before adding more force. Cracked plastic threads mean replacing the entire component.