

Key Takeaways
- Most kitchens have significant untapped storage on walls, cabinet doors, and above appliances.
- Vertical storage works best when items are grouped by frequency of use and kept within easy reach.
- Wall-mounted rails, pegboards, and over-door organizers require minimal tools and no major renovation.
- Stacking shelves and risers can double usable shelf space inside existing cabinets.
- Avoid overcrowding vertical surfaces — visual clutter can make a kitchen feel smaller, not larger.
What you will need
Why Vertical Space Gets Ignored — and Why It Shouldn't
Most kitchen organization efforts focus on drawers, lower cabinets, and counter space. The vertical real estate — the walls between cabinets, the backs of cabinet doors, the gap above the refrigerator — tends to collect nothing but dead air. That's a missed opportunity, especially in smaller kitchens where every square foot counts.
Vertical storage isn't just about cramming more in. Done well, it moves frequently used items to eye level, frees up counter clutter, and keeps cooking zones functional. If you're starting from scratch, our beginner's kitchen organization guide covers how to map out your kitchen zones before adding storage systems.
The key principle: store items where you use them, at the height that makes access easy. Everyday spices belong near the stove at eye level, not stacked on a top shelf you need a step stool to reach.
What you will need
What You'll Need Before You Start
Vertical storage solutions range from completely tool-free (tension rods, over-door hooks) to basic DIY installs (wall anchors, a few screws). Before picking your approach, take stock of your wall materials — drywall, tile, and plaster each require different hardware. When in doubt about load capacity or wall anchoring, consult the hardware store or a handyman rather than guessing.
Tape measure
Measure wall space, cabinet door dimensions, and gaps above appliances accurately before purchasing any organizers.
Stud finder
Locate wall studs for secure mounting of heavier shelves or rail systems.
Drill and wall anchors
Required for mounting shelves, pegboards, or rails into drywall without stud support.
Over-door organizers
Hook over cabinet doors to add instant storage without any drilling or permanent installation.
Shelf risers or stackable shelves
Double usable vertical space inside existing cabinets by creating a second level for items.
Pegboard panel and hooks
Mount on a wall section to create a flexible, reconfigurable system for hanging utensils, pots, and small tools.
Step-by-Step: Setting Up Vertical Storage in Your Kitchen
Work through these steps in order. Skipping the planning phase is the most common reason vertical storage ends up looking chaotic rather than functional. For ideas on what to do with awkward items that resist easy shelving, see our guide on storing awkward kitchen items.
Audit What You Have and Where You Use It
Walk your kitchen and note every item that currently lives on the counter or in an overcrowded drawer. Separate them into two groups: things you reach for daily, and things you use occasionally. Daily-use items are candidates for accessible vertical storage — walls and cabinet doors within arm's reach. Occasional-use items can go higher up or inside upper cabinets.
Identify Your Available Vertical Surfaces
Walk the perimeter of your kitchen and note every usable vertical surface: the wall between upper and lower cabinets (the backsplash zone), the inside and outside of cabinet doors, the sides of cabinets or the refrigerator, and the wall space above upper cabinets. Measure each area with a tape measure and note the dimensions. Not every surface will work for every solution — narrow gaps need slim organizers, tiled backsplashes need different mounting hardware than drywall.
Add Over-Door Organizers to Cabinet Doors
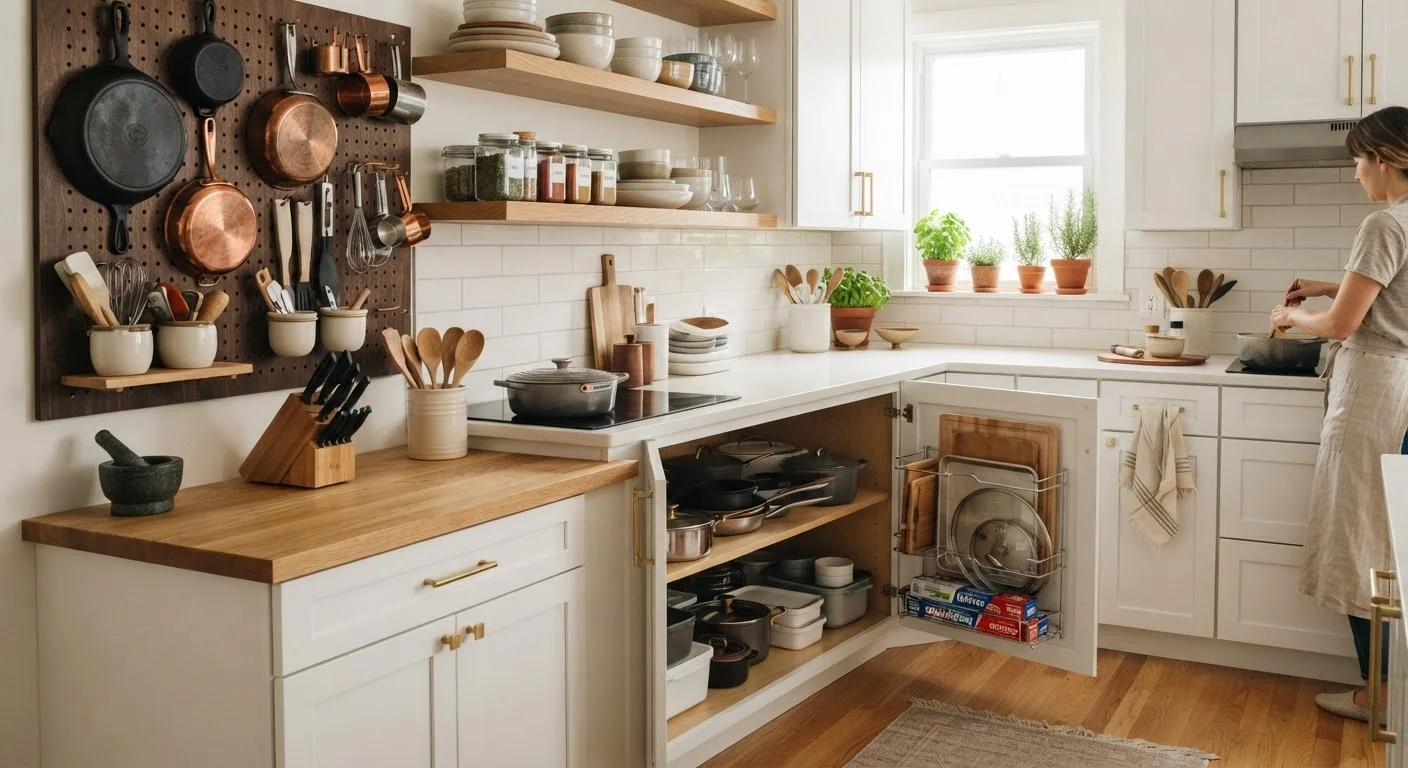
Cabinet doors are the easiest wins — no drilling, no wall anchors, no tools required. Over-door organizers hook onto the top of the door and can hold spices, cleaning supplies, foil and wrap boxes, or small cutting boards. Measure the door's interior clearance (the gap between the door and the shelf inside the cabinet) before purchasing to make sure the organizer won't prevent the door from closing fully.
- Upper cabinet doors: ideal for spices, small jars, and packets
- Lower cabinet doors (under sink): excellent for cleaning spray bottles and sponges
- Pantry doors: can support tiered racks for canned goods and dry goods
Install a Wall Rail or Pegboard in a High-Use Zone
A horizontal wall rail with S-hooks — mounted between your upper cabinets and the counter — can hold frequently used utensils, small pots, and even a paper towel holder. This keeps tools within reach while clearing out crowded utensil drawers. Pegboards offer more flexibility: hooks and small shelves can be repositioned as your needs change. Mount pegboard to wall studs or use appropriate drywall anchors rated for the intended load. Leave a small gap (about half an inch) between the pegboard and the wall so hook hardware has room to sit flush.
Use Shelf Risers and Stackable Shelves Inside Cabinets
Inside your existing cabinets, there's often a large gap of unused vertical space between stacked items and the shelf above. Shelf risers and small stackable shelves slot into that gap to create a second level. Use them to stack plates without tipping, create a second row for spice jars, or organize mugs so they're not buried behind each other. No installation needed — most risers simply sit on the existing shelf surface.
Claim the Space Above Appliances and Upper Cabinets
The top of the refrigerator and the gap between upper cabinets and the ceiling are commonly used as informal dump zones. Instead, use them deliberately. Flat, lidded bins or baskets on top of the refrigerator can neatly store items used less often — baking supplies, overflow pantry goods, or small appliances you use occasionally. If you have open space above upper cabinets, tall baskets or uniform containers make it look intentional rather than cluttered.
Common Pitfalls and How to Avoid Them
The biggest mistake with vertical storage is treating every open wall as fair game. A wall loaded with mismatched hooks, dangling utensils, and crowded shelves creates visual noise that can make a kitchen feel more chaotic than before. Aim for intentional groupings with consistent spacing.
Don't Let Vertical Become Visual Clutter
Adding storage to walls and doors only helps if items are organized and consistently returned to their spots. Open vertical storage — pegboards, wall rails, open shelves — requires more daily maintenance than closed cabinets because everything is visible. If you find yourself avoiding putting things back, it may be a sign the system isn't matched to your habits. Fewer, better-placed hooks will outperform a wall crowded with items that never get used.
Another common problem: mounting shelves or rails without checking stud locations or using appropriate anchors for your wall type. Overloaded drywall anchors can pull free over time, especially in humid kitchen environments. Keep heavy items — cast iron, large appliances — on lower shelves or inside cabinets with solid base support.
If you're weighing whether wall shelves or closed cabinet space makes more sense for your kitchen, our comparison of open shelving versus closed cabinets lays out the practical trade-offs clearly. For more ideas specific to compact kitchens, small kitchen smart storage covers layout tweaks and multi-use tools that complement vertical solutions.