

Key Takeaways
- Measure your cabinet's usable space — accounting for pipes — before buying any organizers.
- Tiered risers and U-shaped shelves let you work around plumbing without blocking access.
- Door-mounted organizers add significant storage without touching the cabinet floor.
- Group items by use frequency: daily-reach products in front, backups or refills behind.
- Keep hazardous cleaning products secured, ideally behind a child-resistant latch.
What you will need
Why the Under-Sink Cabinet Is So Hard to Use
The cabinet beneath the kitchen sink is one of the most frustrating spots in any kitchen. It's deep enough to swallow things whole, interrupted by a drain pipe and shutoff valves, and usually shaped in a way that makes standard shelf inserts useless. Most homeowners end up stuffing it with cleaning bottles and hoping for the best.
The good news: the awkwardness is predictable, which means the fixes are too. Once you understand exactly what you're working around — and measure precisely — you can outfit this cabinet with organizers that genuinely improve your daily routine. If you're doing a broader kitchen audit, pairing this project with a room-by-room kitchen declutter first will help you avoid re-organizing clutter you don't need.
What You'll Need Before You Start
Getting the right tools together before you begin saves multiple trips and prevents the most common mistake: buying organizers that don't fit.
What you will need
Tape measure
Accurately measure cabinet interior width, depth, and height — including the space on each side of the drain pipe.
U-shaped or half-moon shelf riser
Fits around the drain pipe to create an elevated storage tier without blocking plumbing access.
Stackable bins or pull-out drawers
Corral small bottles and sponges in groups, making it easy to slide items forward without rummaging.
Over-door organizer or tension rod
Mounts on the interior cabinet door to hold spray bottles, gloves, or small supplies off the cabinet floor.
Adhesive child-safety latch
Keeps the cabinet door secured in homes with young children, preventing access to cleaning chemicals.
Waterproof shelf liner
Protects the cabinet floor from drips and makes cleanup after minor leaks much easier.
Step-by-Step: Organizing the Under-Sink Cabinet
Follow these steps in order. Skipping the measuring phase is what causes most under-sink organization attempts to fail.
Empty the cabinet completely
Remove every item from the cabinet and sort as you go. Discard empty bottles, consolidate duplicates, and set aside anything that doesn't belong under the sink — such as extra grocery bags or appliances that can live elsewhere. A leaner inventory makes every subsequent step easier.
Measure every usable zone
Measure the full interior width and depth of the cabinet. Then measure the height from the cabinet floor to the underside of the sink basin — this is your true maximum height. Finally, measure the drain pipe's position from each side wall and its diameter. Record the height of the shutoff valve handles as well, since these eat into usable depth on either side.
Divide your cabinet mentally into three zones: left of the pipe, right of the pipe, and the door. Each zone gets its own solution.
Address the pipe zone with a U-shaped shelf
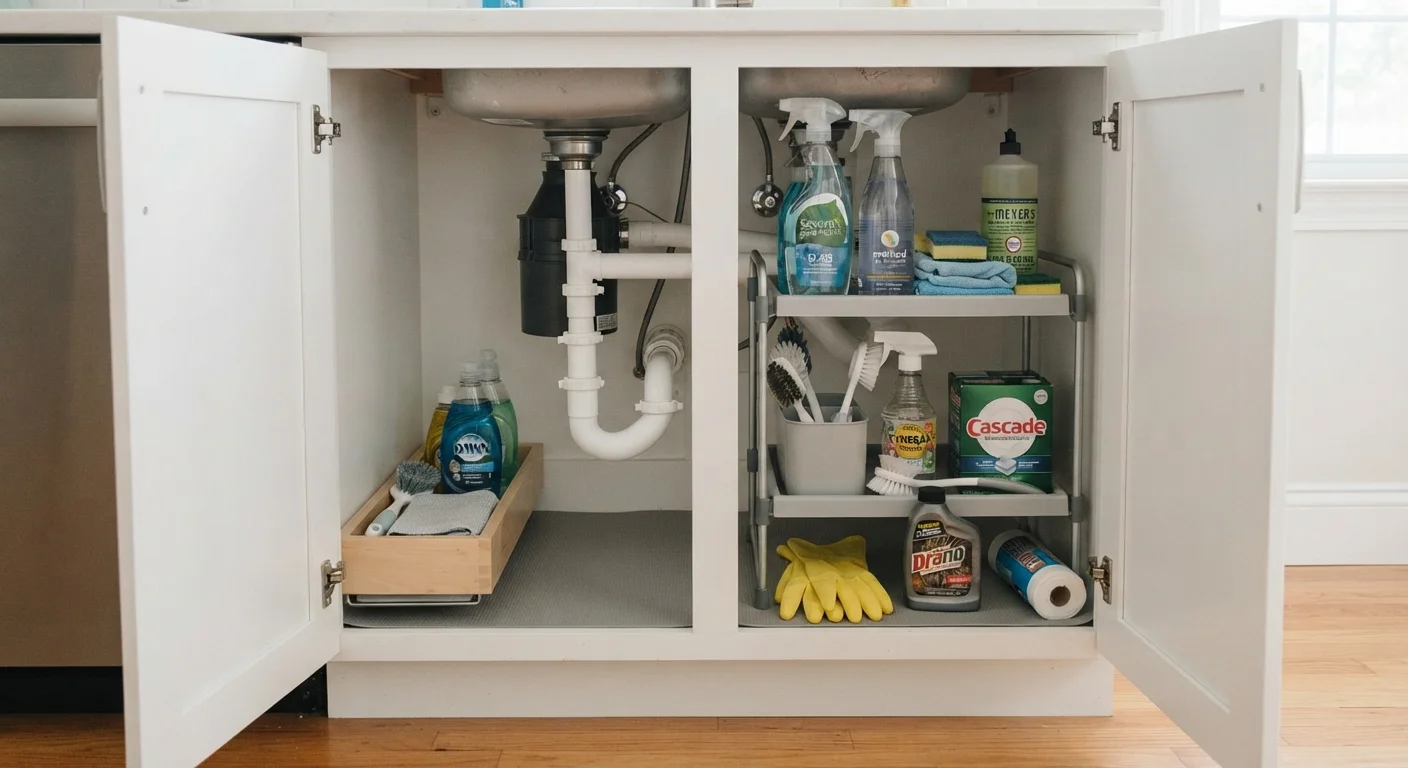
The space directly around the drain pipe is typically wasted. A U-shaped shelf riser — sometimes called a half-moon or pipe-cutout shelf — sits on the cabinet floor and curves around the drain, creating an elevated platform above it. Bulky items like refill jugs store beneath; everyday items store on top. Confirm your pipe measurements before purchasing to ensure the cutout will clear your drain without forcing it.
Use the side zones for pull-out bins
The left and right flanks of the cabinet — beside the pipe and shutoff valves — tend to have the most unobstructed vertical space. Slide-out bins or small pull-out drawers work well here because they let you access items at the back without reaching blindly into the cabinet. Group items logically: one bin for dish and countertop cleaners, another for garbage bags and gloves.
Maximize the cabinet door
The interior face of the cabinet door is often ignored but offers real storage potential. An over-door organizer with pockets or hooks can hold spray bottles (hung by their triggers), rubber gloves, sponges, and small brushes. A pair of tension rods mounted horizontally inside the cabinet — rather than on the door — also works to hang spray bottles vertically, freeing up the floor entirely.
For more unconventional ways to use awkward kitchen zones, see our guide to storing awkward kitchen items.
Return items by use frequency
Put everything back deliberately. Daily-use items — dish soap, sponges, the cleaner you reach for every evening — go at the front of each zone at easy grab height. Refill bottles, backup supplies, and less-used products go behind or above. This simple rule means you rarely have to move things out of the way to get what you actually need.
Less Is More Under the Sink
The under-sink cabinet works best as a home for frequently used cleaning supplies — not a general overflow zone. If you find yourself storing items there simply because you have no better place for them, that's a signal the rest of your kitchen storage may need attention. Our small kitchen storage guide covers strategies for finding homes for everything without relying on one overloaded cabinet.
Maintenance and Safety Considerations
Organization only works if the system stays intact. Schedule a quick monthly reset — pull everything out, wipe down the cabinet floor, and check that nothing is leaking. A slow drip under the sink is easy to miss when bottles are crowded together, and catching it early prevents cabinet floor damage.
If you have children in the home, a simple adhesive cabinet latch on the under-sink door is worth adding. Cleaning products — even seemingly mild ones — should be stored away from food prep areas and ideally out of reach. Never store cleaning chemicals and food items in the same cabinet.
Watch for Moisture and Slow Leaks
The under-sink cabinet is adjacent to active plumbing, which makes it one of the first places mold and water damage can develop unnoticed. If you notice warped cabinet flooring, a musty odor, or water stains after organizing, stop and inspect the drain connections and shutoff valves. Plumbing leaks — even minor ones — should be assessed by a licensed plumber rather than masked with organizers placed on top of them.
For more ideas on using every inch of your kitchen intelligently, explore our guide to vertical kitchen storage solutions or browse broader living space ideas for room-by-room inspiration.